
Evan Lucas
First Post: Solarography!
Published Mar 14, 2021
Solarography
As a fun first test post, I’m going to share some solarography images I’ve taken. Solarography is the practice of taking very long exposure photographs to capture the sun’s path across the sky.
Generally, a pinhole camera is used, which has the advantages of: being very simple, having near-infinite depth of field, and letting in very little light - which is perfect for a very long exposure.
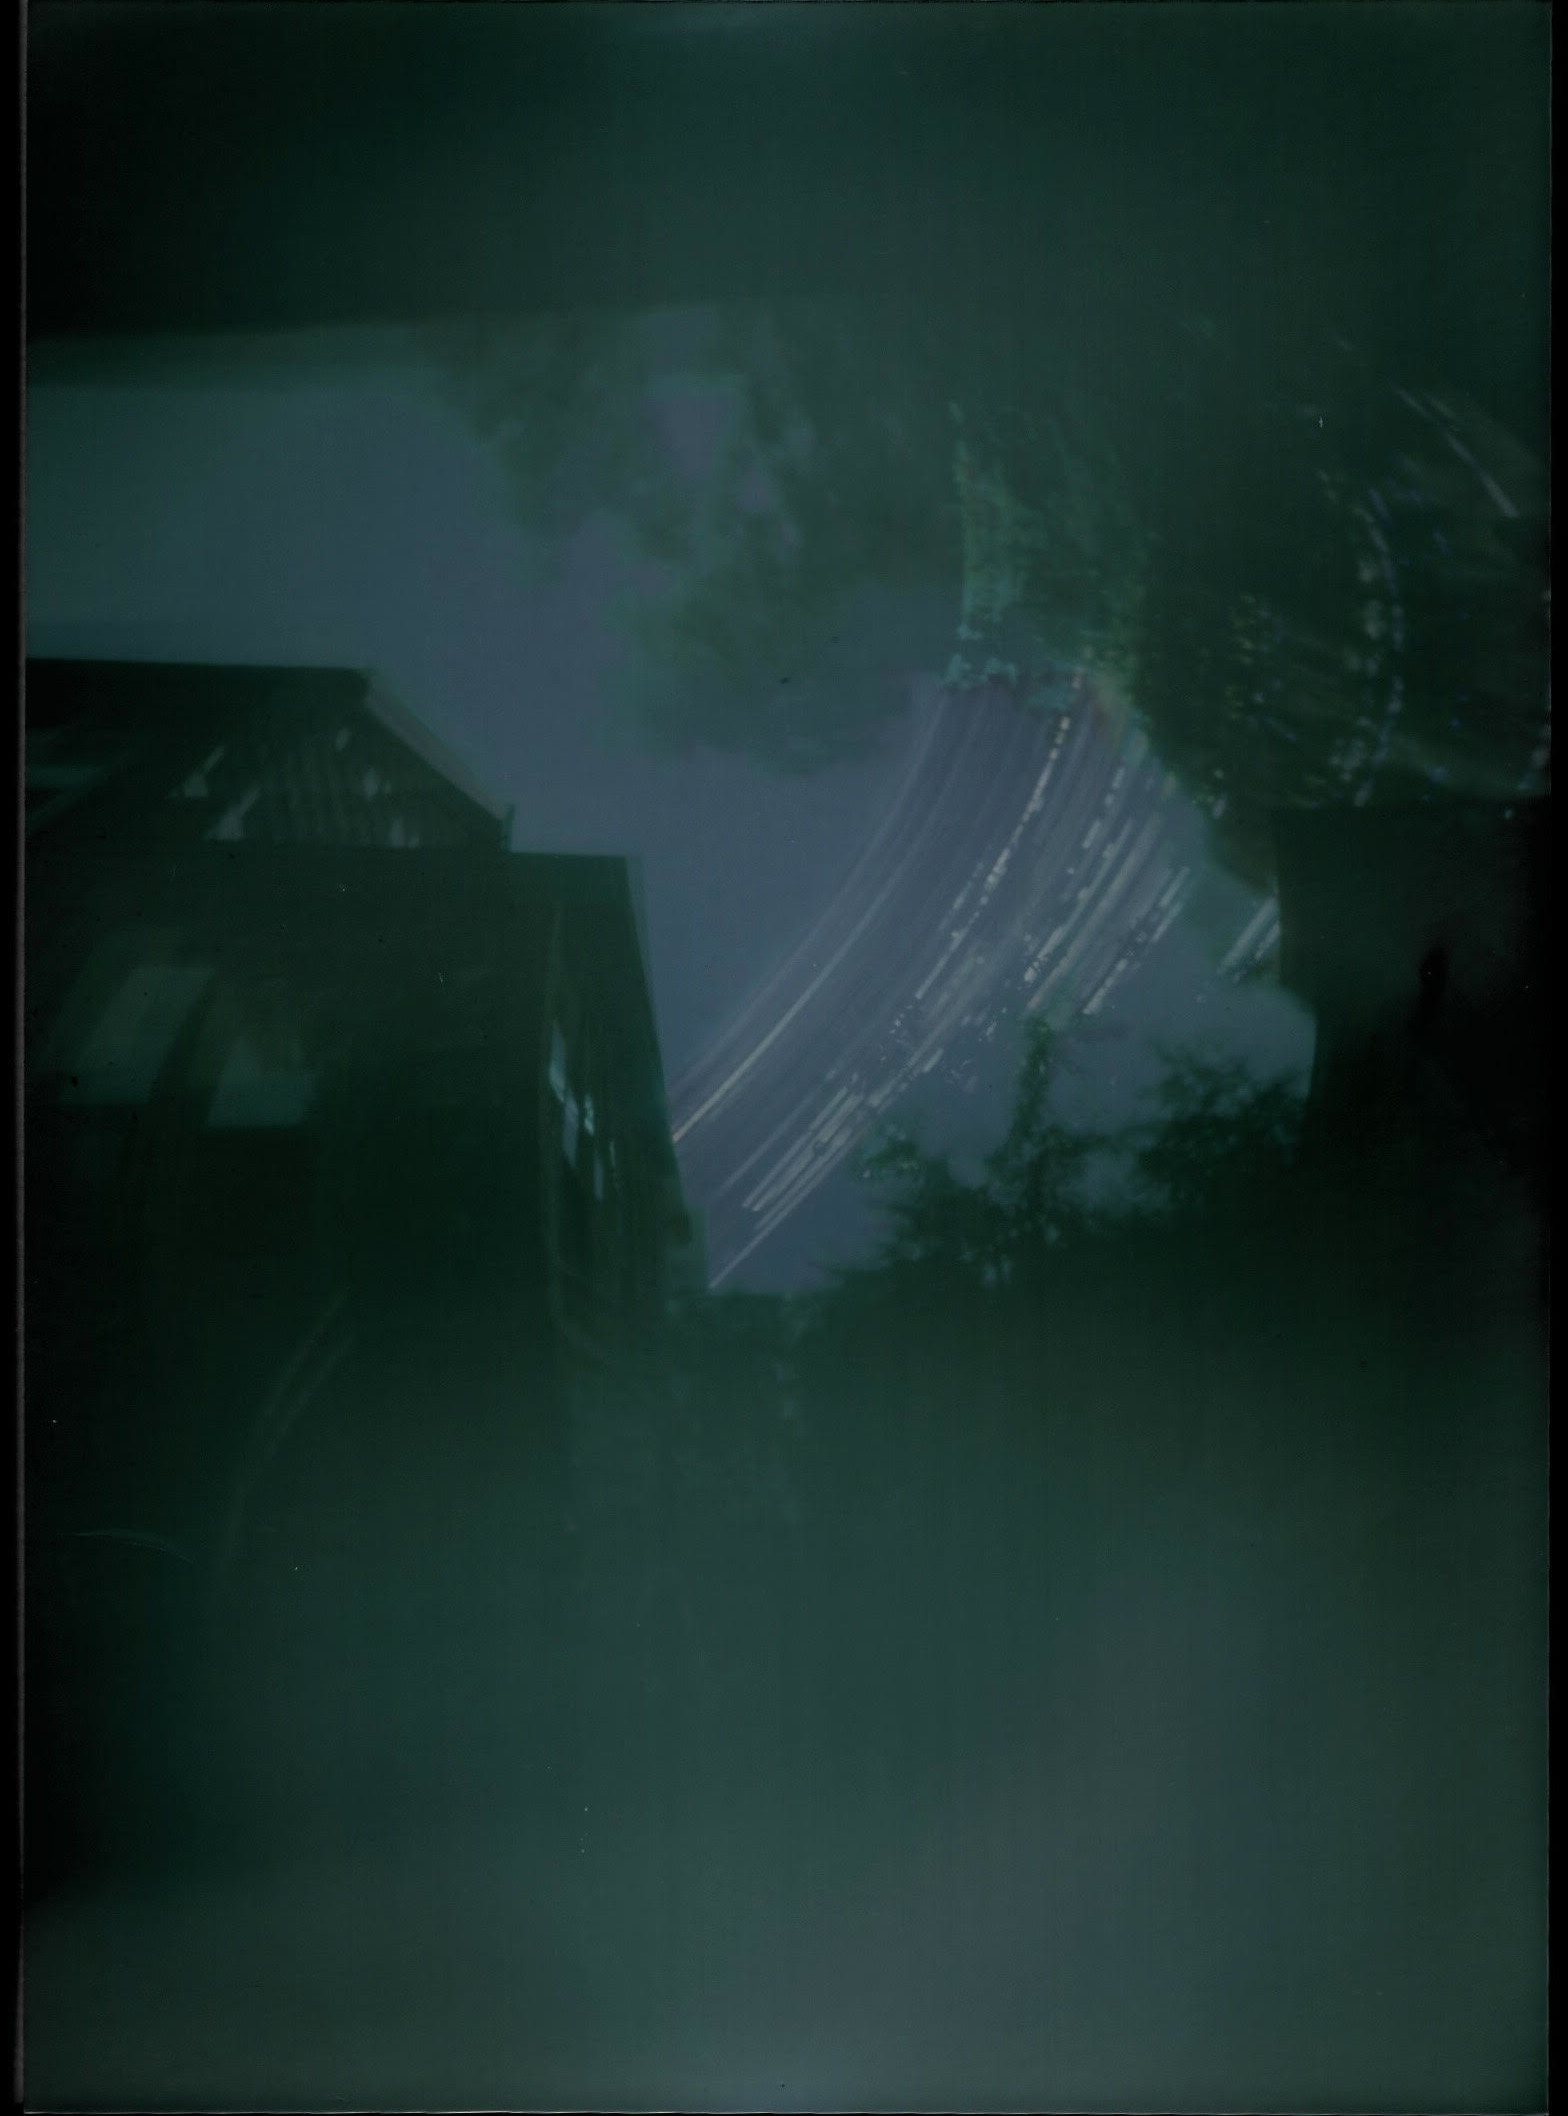
All of the pinhole solarography I’ve done uses black and white photopaper as the receiving medium. This makes a nice analog copy of the image, which I scan and invert. Occasionally I touch up contrast and brightness, but sometimes it comes out pretty nicely from the beginning. Prior to color inversion, the sun trails are burned in as dark colors and everything else typically has an inverted sepia-tone image of the stationary objects.
Here’s the first successful solargraph I took, using a beverage can with a pinhole punched into one side and loaded with photopaper. Every other “camera” from this batch got flooded with rain water and was a soggy mess that didn’t look interesting.
The scanner used for this image was a bit dusty, which is something I’ve paid better attention to in more recent scans.
Second Attempt at Solarography Last summer I built a batch of five different pinhole solarography cameras and had four of them survive about three months. The fifth was held in place by electrical tape, which got hot and slipped off before a strong image was taken. Waiting months to see the results of your work is a test in patience, but it’s part of the fun.
What’s next?
I took the three cylindrical cameras from this summer and installed them facing the sun during the week of the winter solstice, in order to capture the minimum point of the sun’s path on the horizon. In a couple months, I’ll take them down and see how things look.
This summer, I will also make some new cameras and test out some new ideas. I’m trying to find slightly more scenic places I can leave a camera for several months without it being taken or moved.